Running Claude Code with a Private LLM
This guide explains how to set up Claude Code with a local Large Language Model (LLM) using llama.cpp and LiteLLM proxy. This setup ensures privacy, reduces costs, and works offline. It is ideal for developers with intermediate technical skills.
Key Benefits:
- Privacy: Keeps data processing local, avoiding external APIs.
- Cost Savings: No per-token charges, enabling unlimited use.
- Offline Capability: Fully functional without internet.
- Flexibility: Supports custom or fine-tuned models for specific needs.
System Architecture
This setup uses three components:
- llama.cpp Server: Handles model inference with OpenAI-compatible APIs.
- LiteLLM Proxy: Routes requests between Claude Code and llama.cpp.
- Claude Code Client: Connects to the local proxy.
The diagram below shows the data flow:
graph LR
    A[Claude Code] --> B[LiteLLM Proxy]
    B --> C[llama.cpp Server]
    C --> D[Local LLM Model]

    style A fill:#e1f5fe
    style B fill:#f3e5f5
    style C fill:#e8f5e8
    style D fill:#fff3e0
Directory Structure
The following directory layout provides optimal organization for the complete setup:
.venv/
llama.cpp/
llm/
  ggml-org/
    gpt-oss-20b-GGUF/
      gpt-oss-20b-mxfp4.gguf
litellm-proxy/
  Dockerfile
  requirements.txt
  config.yaml
  docker-compose.yaml
vibe-code-example/
  .git/
  .claude/
    settings.json
  CLAUDE.md
System Requirements
Ensure your development environment includes the following dependencies:
- Docker: Container orchestration platform for service deployment
- Git: Version control system for repository management
Phase 1: LLM Service Configuration
Model Acquisition
Download the GPT-OSS 20B model, a high-performance open-source model. The file is about 12GB, so ensure a stable internet connection.
# Create model directory
mkdir -p ./llm/ggml-org/gpt-oss-20b-GGUF

# Download the quantized model (approximately 12GB)
wget \
  -O ./llm/ggml-org/gpt-oss-20b-GGUF/gpt-oss-20b-mxfp4.gguf \
  'https://huggingface.co/ggml-org/gpt-oss-20b-GGUF/resolve/main/gpt-oss-20b-mxfp4.gguf?download=true'
Repository Setup
Clone the llama.cpp repository. This lightweight framework is compatible with OpenAI APIs and ideal for local use.
git clone https://github.com/ggerganov/llama.cpp.git && cd llama.cpp
Build Container Image
Run the following command to build the container image for llama.cpp server:
docker build \
  --build-arg UBUNTU_VERSION="22.04" \
  --build-arg TARGETARCH="amd64" \
  -f ./.devops/cpu.Dockerfile \
  -t mypc/llamacpp:latest \
  .
Phase 2: LiteLLM Proxy Implementation
mkdir litellm-proxy && cd litellm-proxy
Proxy Configuration
Set up the LiteLLM proxy with the following files:
config.yaml: Maps model requests to services.requirements.txt: Lists Python dependencies.Dockerfile: Defines the proxy container.docker-compose.yaml: Manages proxy and llama.cpp services.
config.yaml
model_list:
  - model_name: gptoss
    litellm_params:
      model: openai/gpt-oss-20b
      api_key: "dummy-key"
      api_base: http://llamacpp:8080/v1
requirements.txt
litellm[proxy]==1.75.9
Dockerfile
FROM docker.io/library/python:3.10.18-slim-bookworm
WORKDIR /app
COPY requirements.txt requirements.txt
RUN python -m pip install --no-cache-dir -r requirements.txt
docker-compose.yaml
---
services:
  litellm:
    build:
      context: .
      dockerfile: ./Dockerfile
    image: mypc/litellm:latest
    ports:
      - "4000:4000"
    entrypoint:
      - /bin/bash
      - -c
    command:
      - litellm --config ./config.yaml --port 4000 --debug
    volumes:
      - "./config.yaml:/app/config.yaml:ro"
    depends_on:
      - llamacpp
  llamacpp:
    image: mypc/llamacpp:latest
    command:
      - --ctx-size
      - "0"
      - --predict
      - "-1"
      - --jinja
      - -m
      - /models/gpt-oss-20b-mxfp4.gguf
      - --log-colors
      - --verbose
      - --port
      - "8080"
      - --host
      - 0.0.0.0
    volumes:
      - "/path/to/gpt-oss-20b-GGUF/gpt-oss-20b-mxfp4.gguf:/models/gpt-oss-20b-mxfp4.gguf:ro"
    ports:
      - "8080:8080"
Build and start the containers for the LiteLLM proxy and llama.cpp server.
docker compose build
docker compose up -d
Proxy Validation
Test the proxy by sending a chat request. Use jq to format the JSON response.
curl -X POST http://localhost:4000/v1/chat/completions \
  -H "Content-Type: application/json" \
  -H "Authorization: Bearer dummy-key" \
  -d '{
    "model": "gptoss",
    "messages": [{"role": "user", "content": "Where is the capital of France?"}],
    "max_tokens": 50
  }' | jq .
The proxy will return a properly formatted chat completion response, demonstrating successful integration between the proxy layer and the underlying model:
JSON response from LiteLLM proxy server
{
  "id": "chatcmpl-ZF1imep5FeYTlvElk3FHjZldipSS7xhg",
  "created": 1755919129,
  "model": "gpt-oss-20b",
  "object": "chat.completion",
  "system_fingerprint": "b6250-e92734d5",
  "choices": [
    {
      "finish_reason": "stop",
      "index": 0,
      "message": {
        "content": "Paris is the capital of France.",
        "role": "assistant",
        "reasoning_content": "User asks \"Where is the capital of France?\" The answer: Paris. It's a location-based question. So location-based, short answer."
      },
      "provider_specific_fields": {}
    }
  ],
  "usage": {
    "completion_tokens": 45,
    "prompt_tokens": 74,
    "total_tokens": 119
  },
  "timings": {
    "prompt_n": 74,
    "prompt_ms": 2008.592,
    "prompt_per_token_ms": 27.143135135135136,
    "prompt_per_second": 36.84172793678358,
    "predicted_n": 45,
    "predicted_ms": 5420.392,
    "predicted_per_token_ms": 120.45315555555555,
    "predicted_per_second": 8.301982587237234
  }
}
Phase 3: Claude Code Integration
Project Initialization
Establish a dedicated project directory for Claude Code configuration:
# Create demo project
mkdir vibe-code-example && cd vibe-code-example

# Initialize git repository
git init

# Create Claude Code configuration directory
mkdir .claude
Client Configuration
Create a .claude/settings.json file to configure Claude Code. Key parameters:
ANTHROPIC_BASE_URL: Proxy URL.ANTHROPIC_MODEL: Default model.ANTHROPIC_AUTH_TOKEN: Authentication token.
{
  "env": {
    "ANTHROPIC_BASE_URL": "http://localhost:4000",
    "ANTHROPIC_MODEL": "gptoss",
    "ANTHROPIC_SMALL_FAST_MODEL": "gptoss",
    "ANTHROPIC_AUTH_TOKEN": "dummy-key"
  },
  "completion": {
    "temperature": 0.1,
    "max_tokens": 4000
  }
}
Service Activation
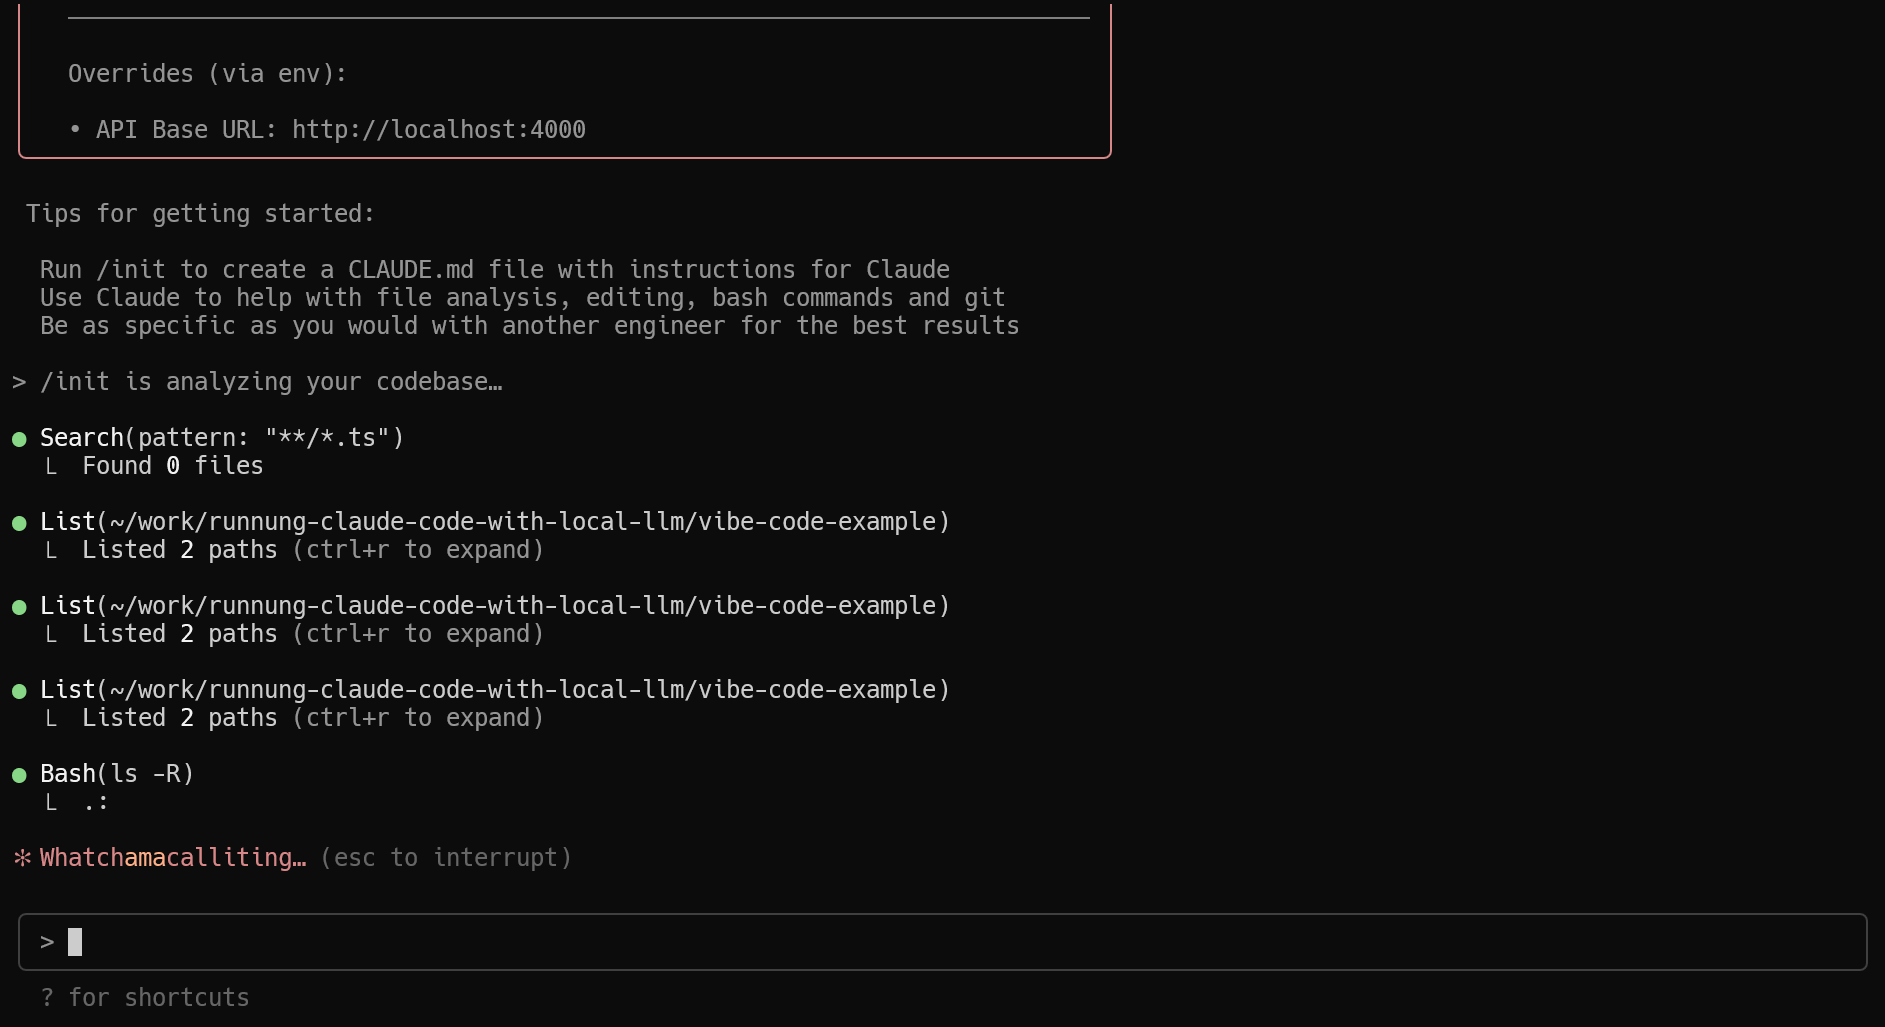
Run Claude Code in the project directory. If it fails, check the .claude/settings.json file and ensure the proxy is running.
claude
Execute the /init command to trigger automatic project configuration. Claude Code will generate a CLAUDE.md file containing project-specific instructions and guidelines.

Conclusion
LiteLLM acts as a abstraction layer, making it super easy to connect Claude Code with any LLM provider. Whether you're using llama.cpp locally or tapping into other APIs, LiteLLM simplifies the process by handling all the routing and protocol translation for you. This means you can focus on building and experimenting without worrying about the technical details of integration.